What’s New
Electroshocking Survey with DWR Report
Island Park Fishout Report
Scouts on the Water – Troop 1262
Casting Clinic & Fish-Out
Protecting Trout in the Summer
13 Flies for your Summer Fly Box
16th Weber River Crossover Installed
HCFF Activity/Fishout Reports
Cal Massey Inducted into Hall of Fame
Complementary TU Membership
for 2025 – limited time offer!
Renew your TU Membership for Free for 2025.
Provo River Flow Reports
Weber River Flow Reports
CUWCD Reservoirs & Weather
David Whiteman provides a comprehensive
exploration of our home waters,
the Middle Provo:
An Introduction for Fisherman
Video Tour of the Middle Provo River
Macroinvertebrates of the Middle Provo River
Middle Provo River Temperature Study
John Schultz shares two new successful Stillwater Patterns
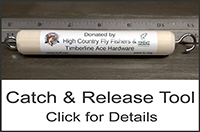
Catch & Release Tool
As fly fishers, we understand the importance of being good stewards for both the environment and the fish we love, but unfortunately our usual practice of landing a fish in a net and holding it while we remove the fly can be very harmful to the fish. As described in the catch and release study you can download below, fish evolved to live and function in water and, once removed, their gills collapse and their respiratory system shuts down, which is especially dangerous when the fish is stressed and exhausted after a fight. Furthermore, touching a fish, especially with dry hands or gloves, can remove the protective slime a fish needs to protect itself from bacteria. Clearly, the best practice is to touch the fish as little as possible and return it to the water as quickly as possible.
In a dedicated effort to do less harm, an HCFF member developed the Catch & Release Tool (CRT) in early 2020. Several members then tested the tool extensively during the year and discovered they could easily release fish without using a net or ever touching the fish except for an occasional photograph. High Country Fly Fishers then created 250 CRTs for distribution to local fly fishers.
Instructions for Use
If you are right-handed, once the fish is close, use your left hand to grab the leader about a fish-length above the fish. Hook the leader with the CRT in your right hand, slide the tool down to the fish’s mouth and connect the CRT hook to the bend of the fishhook. Once you have the two hooks connected, move the leader to the fish’s tail with your left hand. You should then be holding the fish vertically by the CRT. The weight of the fish is usually enough for the hook to release from the fish’s mouth and drop it safely into the water. If not, a little shake will do the trick. With a barbless hook, the release is even quicker.
HCFF Catch & Release Tool Instructions
Material List
- 3⁄4-inch wooden dowels
- 3⁄4-inch cup hooks
- 1-inch screw eyes
- Superglue
- Materials are available at nearly any hardware store
- Labels are optional. We used OnlineLabels.com and Maestro Label Designer.
Instructions
- Cut dowels to 4 5/8 inch
- Sand dowel ends to a slight chamfer
- Drill one end with a 3/32 drill for hooks
- Drill opposite end with 7/64 drill for the screw eye
- Screw in hooks with a dab of superglue in the hole
- Screw in screw eyes in the other end
- Attach labels if desired
Fabrication Hints
For the HCFF project, we set out to make 250 CRTs and one of our team had a wood shop with a wide variety of tools. We used a miter saw to cut the dowels and set up a fence on so we could cut four dowels at one time. Then we used a drill press with a jug to hold the dowels vertical and drill the holes. Finally, we used a belt sander to round the ends.


